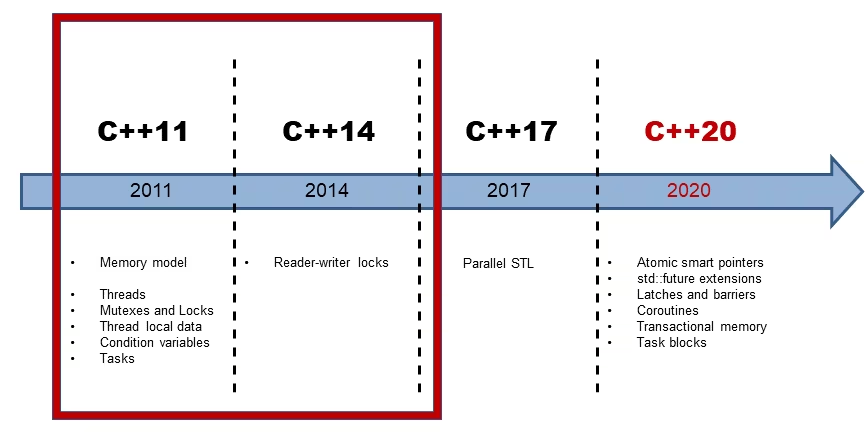
cpp11之后,cpp本身对并发的支持大大增强,这里记录一下
std::thread class
cpp的thread类型,创建即运行,不像java那样需要start,thread表示一个系统资源,一个系统线程
构造函数
| function | construct |
|---|
| constructor 1 | thread() noexcept; |
| constructor 2 | thread(thread&& other) noexcept; |
| constructor 3 | template<class F, class... Args>
explicit thread(F&& f, Args&&... args); |
| copy constructor | thread(const thread&) = delete; |
| assign copy operator | thread& operator=(const thread&) = delete; |
| assign move operator | thread& operator=(thread&& other) noexcept; |
- 默认构造函数,创建一个空的 thread 执行对象;
- 初始化构造函数,创建一个 thread对象,该 thread对象可被 joinable,新产生的线程会调用 fn 函数,该函数的参数由 args 给出;
- 拷贝构造函数被禁用,意味着 thread 不可被拷贝;
- 赋值操作被禁用,thread 对象不可被拷贝。
- move 构造函数, 调用成功之后 other 不代表任何 thread 执行对象;
- move 赋值操作,如果当前对象不可 joinable,需要传递一个右值引用(rhs)给 move 赋值操作;如果当前对象可被 joinable,则 terminate() 报错;
注意:可被 joinable 的 thread 对象必须在他们销毁之前被主线程 join 或者将其设置为 detached.
this_thread namespace
this_thread这个命名空间下定义了几个有用的静态函数
| functional | detail |
|---|
std::thread::id get_id() const noexcept; | 获取当前thread的id,这个id是cpp自己定义的 |
void yield() noexcept; | 把调度机会让给其他的thread |
void sleep_until( const std::chrono::time_point tp) | sleep到指定的 time_point |
void sleep_for( const std::chrono::duration duration) | sleep 指定的 duration |
1
2
3
4
5
6
7
8
9
| #include <thread>
#include <chrono>
using namespace std;
int main(int argc, char *argv[]){
this_thread::sleep_until(std::chrono::steady_clock::now() + 1234ms);
this_thread::sleep_for(1234ms);
return 0;
}
|
其他相关函数
| function | detail |
|---|
bool joinable() const noexcept; | 检查thread是否可以 join |
native_handle_type native_handle(); | 获取平台相关联的id,posix系统一般是关联的pthread,这个函数要在thread未调用join之前用,之后只会返回0 |
static unsigned int hardware_concurrency() noexcept; | 系统支持的线程数,比如2核但是支持超线程,可能返回4 |
void detach(); | 脱离用户管理,类似pthread_detach |
void swap( std::thread& other ) noexcept; | 交换thread的ownership |
std::ref(T&) | 返回引用, |
std::cref(T&) | 返回const引用 |
线程退出
cpp 的 thread 缺少类似 java 的 interrupt,一般有2种方式来终止:
- 通过某个变量来控制是否退出
- 调用native_handle获取到pthread_id,然后再调用 pthread_cancel
1
2
3
4
5
6
7
8
9
10
11
12
13
14
15
16
17
18
19
20
21
22
23
24
25
26
27
28
29
30
31
32
33
34
35
36
| #include <iostream>
#include <thread>
using namespace std;
void func1(atomic_bool& quit) {
while (!quit) {
this_thread::sleep_for(100ms);
}
cout << "thread1 quit\n";
}
void func2() {
while (true) {
this_thread::sleep_for(100ms);
}
cout << "thread2 quit\n";
}
int main(int argc, char *argv[]) {
atomic_bool quit(false);
cout << "start func1" << endl;
thread t1{func1, ref(quit)};
this_thread::sleep_for(5s);
quit.store(true);
t1.join();
cout << "func1 joined" << endl;
cout << "start func2" << endl;
thread t2{func2};
this_thread::sleep_for(5s);
pthread_cancel(t2.native_handle());
t2.join();
cout << "func2 joined" << endl;
return 0;
}
|
thread_local 数据
thread_local 的数据是一个线程独有的数据,其他线程无法访问(除非用指针),还可以是 extern 的。
1
2
3
4
5
6
7
8
9
10
11
12
13
14
15
16
17
18
| #include <iostream>
#include <string>
#include <thread>
using namespace std;
thread_local unsigned int rage = 1;
void increase_rage(const std::string& thread_name) {
++rage;
cout << "Rage counter for " << thread_name << " : " << rage << '\n';
}
int main() {
thread a(increase_rage, "a");
a.join();
thread b(increase_rage, "b");
b.join();
}
|
mutex
互斥量和条件变量,
相关类或函数
| class | describe |
|---|
| mutex | 基本的 mutex 类 |
| recursive_mutex | 递归 mutex 类, 可以被同一个thread重复获取 |
| timed_mutex | 定时非递归 mutex 类,在指定时长内获取mutex |
| recursive_timed_mutex | 定时递归 mutex 类, |
| lock_guard<M> | 析构时释放 M, lock 只能使用 adopt_lock(见表中) 标志 |
| unique_lock<M> | movable,but not copyable, 灵活性高
区别与 mutex 的不可移动不可拷贝,但是性能低于 mutex
析构时释放 M,也可以提前调用unlock()来降低锁的粒度,unique_lock中保存了锁状态 |
| shared_lock<M> c++14 | TODO |
| std::lock(M1,M2…) | 同时获取多个锁, 使用了死锁避免算法,这是一个函数,不会自动释放全部获取到的锁 |
| scoped_lock<M…> c++17 | std::lock的 RAII-style 的封装,析构时释放全部获取到的锁 |
| defer_lock | 这是一个标志,表示只是获取m的ownership, 但是不调用lock()函数,线程还没有获取到锁 |
| adopt_lock | 这是一个标志,表示只是获取m的ownership, 但是不调用lock()函数,这个需要线程先获取到锁 |
1
2
3
4
5
6
7
8
9
10
11
12
13
14
15
16
17
18
19
20
21
22
23
24
25
26
27
28
29
30
31
32
33
34
35
| #include <mutex>
#include <iostream>
using namespace std;
int main(int argc, char *argv[])
{
mutex mtx1, mtx2;
{
lock_guard l(mtx1);
}
{
std::lock(mtx1, mtx2);
lock_guard l1(mtx1, adopt_lock);
lock_guard l2(mtx2, adopt_lock);
}
{
scoped_lock lock(mtx1, mtx2);
}
{
unique_lock l1(mtx1, std::defer_lock);
unique_lock l2(mtx2, std::defer_lock);
std::lock(l1, l2);
if(l1.owns_lock() && l2)
cout << "own metux" << endl;
else
cout << "onwership is moved!\n";
}
lock_guard l(mtx1);
return 0;
}
|
call_once
使用 std::once_flag 和 std::call_once 来保证单次执行, c++中双重检查也存在潜在竞争,C++和双重检查锁定模式(DCLP)的风险,所以还是推荐使用 call_once
1
2
3
4
| void init(string file_path) {
static once_flag flag;
call_once(flag, init_from_file, file_path);
}
|
condition
条件变量(condition variables)是用于线程间同步的重要工具,允许线程在某个条件不满足时挂起等待,直到其他线程通知该条件已满足。
相关类
| class | describe |
|---|
| condition_variable | 提供与std::unique_lock配合使用的条件变量 |
| condition_variable_any | 提供与任何满足基本要求的锁配合使用的条件变量 |
| notify_all_at_thread_exit | 安排在当前线程完全退出时通知所有等待的线程 |
| cv_status | 列举条件变量状态的枚举类型 |
condition_variable
std::condition_variable 是最常用的条件变量类型,必须与 std::unique_lock<std::mutex> 一起使用。
主要成员函数
| function | detail |
|---|
void wait(unique_lock lock) | 阻塞当前线程直到条件变量被通知 |
template<class Predicate>
void wait(unique_lock lock, Predicate pred) | 带谓词的等待,等价于while(!pred()) wait(lock); |
cv_status wait_for(unique_lock lock, const duration rel_time) | 等待指定时间或直到被通知 |
template<class Rep, class Period, class Predicate>
bool wait_for(unique_lock lock, const duration rel_time, Predicate pred) | 带谓词和超时的等待 |
cv_status wait_until(unique_lock lock, const time_point abs_time) | 等待到指定时间点或直到被通知 |
template<class Predicate>
bool wait_until(unique_lock lock,const time_point abs_time, Predicate pred) | 带谓词和时间点的等待 |
void notify_one() | 通知一个等待的线程 |
void notify_all() | 通知所有等待的线程 |
condition_variable_any
std::condition_variable_any 与 condition_variable 类似,但可以与任何满足基本要求的锁类型一起使用,而不仅限于 std::unique_lock<std::mutex>。由于实现复杂度较高,通常推荐使用 condition_variable。
使用示例
以下是一个经典的生产者-消费者模型示例:
1
2
3
4
5
6
7
8
9
10
11
12
13
14
15
16
17
18
19
20
21
22
23
24
25
26
27
28
29
30
31
32
33
34
35
36
37
38
39
40
41
42
43
44
45
46
47
48
49
50
51
52
53
54
55
56
57
58
| #include <iostream>
#include <thread>
#include <mutex>
#include <condition_variable>
#include <queue>
std::mutex mtx;
std::condition_variable cv;
std::queue<int> data_queue;
bool finished = false;
void producer() {
for (int i = 0; i < 5; ++i) {
std::this_thread::sleep_for(std::chrono::milliseconds(100));
{
std::lock_guard<std::mutex> lock(mtx);
data_queue.push(i);
std::cout << "Produced: " << i << std::endl;
}
cv.notify_one();
}
{
std::lock_guard<std::mutex> lock(mtx);
finished = true;
}
cv.notify_all();
}
void consumer(int id) {
while (true) {
std::unique_lock<std::mutex> lock(mtx);
cv.wait(lock, []{ return !data_queue.empty() || finished; });
if (!data_queue.empty()) {
int data = data_queue.front();
data_queue.pop();
std::cout << "Consumer " << id << " consumed: " << data << std::endl;
lock.unlock();
} else if (finished) {
break;
}
}
}
int main() {
std::thread prod(producer);
std::thread cons1(consumer, 1);
std::thread cons2(consumer, 2);
prod.join();
cons1.join();
cons2.join();
return 0;
}
|
注意事项
虚假唤醒:线程可能在没有收到通知的情况下被唤醒,因此通常需要在循环中检查条件:
1
2
3
4
| std::unique_lock<std::mutex> lock(mtx);
while (!condition) {
cv.wait(lock);
}
|
谓词形式:使用带谓词的 wait()
1
2
| std::unique_lock<std::mutex> lock(mtx);
cv.wait(lock, []{ return condition; });
|
锁的顺序:调用 wait()前必须持有锁,wait() 会自动释放锁并在返回前重新获取锁。
通知方式:
notify_one():只唤醒一个等待线程notify_all():唤醒所有等待线程
高级用法和最佳实践
与多个条件配合使用
在复杂场景中,可能需要多个条件变量协调工作:
1
2
3
4
5
6
7
8
9
10
11
12
13
14
15
16
17
18
19
20
21
22
23
24
25
26
27
28
29
30
31
32
33
34
35
36
37
| #include <iostream>
#include <thread>
#include <mutex>
#include <condition_variable>
class ThreadPool {
private:
std::mutex queue_mutex;
std::condition_variable condition;
bool stop;
public:
ThreadPool() : stop(false) {}
void start() {
std::thread worker([this] {
while (true) {
std::unique_lock<std::mutex> lock(this->queue_mutex);
this->condition.wait(lock, [this] { return this->stop; });
if (this->stop) {
std::cout << "Worker thread stopping..." << std::endl;
break;
}
}
});
worker.detach();
}
void shutdown() {
{
std::unique_lock<std::mutex> lock(queue_mutex);
stop = true;
}
condition.notify_all();
}
};
|
使用 std::notify_all_at_thread_exit
当需要确保在线程完全退出后才通知其他线程时,可以使用 std::notify_all_at_thread_exit:
1
2
3
4
5
6
7
8
9
10
11
12
13
14
15
16
17
18
19
20
21
22
23
24
25
26
27
28
29
30
31
32
33
34
| #include <chrono>
#include <iostream>
#include <mutex>
#include <condition_variable>
#include <thread>
std::mutex m;
std::condition_variable cv;
bool ready = false;
std::string result;
void worker_thread(){
std::unique_lock<std::mutex> lk(m);
result = "processing data";
std::notify_all_at_thread_exit(cv, std::move(lk));
std::this_thread::sleep_for(std::chrono::seconds(1));
result = "data processed";
ready = true;
}
int main() {
std::thread t(worker_thread);
std::unique_lock<std::mutex> lk(m);
cv.wait(lk, []{ return ready; });
std::cout << "Result: " << result << std::endl;
t.join();
}
|
性能优化建议
减少锁竞争:
- 尽可能缩短持有锁的时间
- 在调用
wait() 前预先准备好数据
选择合适的等待方式:
- 使用超时等待避免无限期阻塞
- 根据业务场景选择
notify_one() 还是 notify_all()s
避免死锁:
- 始终以相同顺序获取多个锁
- 使用
std::lock() 或 std::scoped_lock 同时获取多个锁
C++20 中的改进
C++20 引入了更多现代化的并发工具,包括对条件变量的改进:
1
2
3
4
5
6
7
8
|
std::condition_variable cv;
std::mutex mtx;
bool condition = false;
std::stop_token st;
|
基于任务的并发
thread 类过于底层,使用起来会分散注意力的
| class | describe |
|---|
packaged_task<F> | 打包可调用对象F作为任务运行 |
promise<T> | |
future<T> | |
shared_future<T> | |
x=async(policy, f, args) | |
x=async(f, args) | |
future & promise
promise 可以保存某一类型的值, 该值可被 future 对象读取(可能在另外一个线程中),因此 promise 也提供了一种线程同步的手段。在 promise 对象构造时可以和一个共享状态(通常是 future)相关联,并可以在相关联的共享状态(future)上保存一个类型为 T 的值。
可以通过 get_future 来获取与该 promise 对象相关联的 future 对象,调用该函数之后,两个对象共享相同的共享状态(shared state)
例子:
1
2
3
4
5
6
7
8
9
10
11
12
13
14
15
16
17
18
19
20
21
22
23
24
| #include <chrono>
#include <functional>
#include <future>
#include <iostream>
#include <thread>
using namespace std;
void print_int(promise<int> promise) {
cout << "thred id : [" << this_thread::get_id() << "] start.\n";
promise.set_value_at_thread_exit(10);
this_thread::sleep_for(chrono::seconds(3));
cout << "thred id : [" << this_thread::get_id() << "] exit.\n";
}
int main() {
promise<int> prom;
future<int> fut = prom.get_future();
thread(print_int, std::move(prom)).detach();
auto val = fut.get();
cout << "get future [" << val << "]" << endl;
return 0;
}
|
packaged_task
packaged_task 是对一个任务和一对(promise/future)的封装,让使用更加的便捷
1
2
3
4
5
6
7
8
9
10
11
12
13
14
15
16
17
18
19
20
21
22
23
24
25
26
27
28
29
30
31
32
33
| #include <string>
#include <iostream>
#include <thread>
#include <future>
using namespace std;
int demo(int i) {
cout << this_thread::get_id() <<" thread start (" << i << ")\n";
this_thread::sleep_for(3s);
if (i) return i*i;
throw runtime_error("demo(0)");
}
int main(int argc, char *argv[])
{
packaged_task<int(int)> task1{demo};
packaged_task<int(int)> task2{demo};
auto f1 = task1.get_future();
auto f2 = task2.get_future();
thread(std::move(task1), 2).detach();
thread(std::move(task2), 0).detach();
f1.wait_for(0s);
cout << "------- [" << this_thread::get_id() << "] start call future.get() -------\n";
try {
cout << "[" << f1.get() << "]" << endl;
cout << f2.get() << endl;
} catch (const exception& e) {
cerr << "exception: " << e.what() << endl;
}
return 0;
}
|
运行结果为:
1
2
3
4
5
| 281473574039936 thread start (2)
------- [281473579782208] start call future.get() -------
281473565585792 thread start (0)
4
exception: demo(0)
|
线程启动器 async
线程启动器(thread launch)是一个函数, 它决定是否创建新线程、回收旧线程或者简单的在本thread上执行;
async 可以看做是一个复杂的线程启动器的简单接口,调用 async 简单的返回一个future<R>
| launch | method |
|---|
fu = async(policy, f, args) | 根据启动策略执行 |
fu = async(f, args) | 等同于 async(launch::async|launch::deferred, f, args) |
表中有2种策略,这是目前支持的只有这2种:
- launch::async : 就像 创建了一个新线程一样执行
- launch::deferred : 延时执行,等到future执行get的时候在执行
launch::async 线程启动器有很大的决策权,是否创建新线程或者底层使用线程池,依赖各个系统的实现了。
1
2
3
4
| std::future<int> f2 = std::async(std::launch::async, [](){ return 8; });
f2.wait();
cout << f2.get() << endl;
|
atomic
C++11 引入了原子操作库,定义在头文件中,提供了一种无锁的同步机制。原子操作是指不会被线程调度机制打断的操作,这种操作一旦开始,就一直运行到结束,中间不会有任何线程切换。
基本概念
原子类型是封装了一个值的类型,这个值的访问保证不会导致数据竞争,并且可以在并发环境中安全地修改。
常用原子类型
C++ 提供了多种原子类型,主要包括:
std::atomic_bool 或 std::atomic<bool> - 原子布尔类型std::atomic_char 或 std::atomic<char> - 原子字符类型std::atomic_int 或 std::atomic<int> - 原子整型std::atomic_long 或 std::atomic<long> - 原子长整型std::atomic_pointer 或 std::atomic<T*> - 原子指针类型
基本操作
load 和 store 操作
1
2
3
4
5
6
7
8
9
10
11
12
13
14
| #include <atomic>
#include <iostream>
#include <thread>
std::atomic<int> atomic_var{0};
void writer() {
atomic_var.store(42);
}
void reader() {
int value = atomic_var.load();
std::cout << "Value: " << value << std::endl;
}
|
exchange 操作
exchange 操作会用新值替换当前值,并返回旧值:
1
2
| std::atomic<int> atomic_var{10};
int old_value = atomic_var.exchange(20);
|
compare_exchange 操作
compare_exchange_weak 和 compare_exchange_strong 是原子的比较并交换操作:
1
2
3
4
5
6
7
| std::atomic<int> atomic_var{10};
int expected = 10;
int new_value = 20;
bool success = atomic_var.compare_exchange_weak(expected, new_value);
|
内存顺序
原子操作可以指定不同的内存顺序约束,以平衡性能和一致性。内存顺序定义了操作之间的可见性和排序规则,是并发编程中性能优化的关键。
| 内存顺序 | 功能描述 | 使用场景 | 示例代码 |
|---|
memory_order_relaxed | 仅保证原子性,无同步保证,顺序可能被重排。 | 计数器、统计等无同步场景。 | counter.fetch_add(1, memory_order_relaxed); |
memory_order_consume | 依赖加载,后续依赖操作不重排。C++17废弃,等同于acquire。 | 不建议使用 | 不建议使用 |
memory_order_acquire | 获取锁,后续操作不前移。确保看到释放前的所有写入。 | 读取共享数据时使用 | if (flag.load(memory_order_acquire)) { /*安全读取*/ } |
memory_order_release | 释放锁,前序操作不后移。通知其他线程数据已就绪。 | 写入共享数据后使用 | data = 42; flag.store(true, memory_order_release); |
memory_order_acq_rel | 兼具acquire/release,读-改-写操作专用。 | fetch_add等RMW操作 | counter.fetch_add(1, memory_order_acq_rel); |
memory_order_seq_cst | 顺序一致,全局总序。默认但性能开销最大。 | 需要严格一致性的场景 | atomic_var.store(42); // 默认seq_cst |
关键原则:
- Release-Acquire配对:写线程使用
release,读线程使用acquire,建立同步关系 - 性能vs安全性:越宽松的内存顺序性能越好,但正确性越难保证
- 默认安全:不确定时用
seq_cst,性能瓶颈确认后再优化 - 避免数据竞争:即使使用
relaxed,也要确保程序无数据竞争
典型模式示例:
1
2
3
4
5
6
7
8
9
10
11
12
13
14
15
16
17
18
|
std::atomic<int> data_ready{0};
int shared_data = 0;
void producer() {
shared_data = 42;
data_ready.store(1, std::memory_order_release);
}
void consumer() {
while (data_ready.load(std::memory_order_acquire) == 0) {
std::this_thread::yield();
}
std::cout << "Data: " << shared_data << std::endl;
}
|
应用示例
在前面的线程退出示例中,我们已经使用了 atomic_bool:
1
2
3
4
5
6
7
8
9
10
11
12
13
14
15
16
17
18
19
20
21
| #include <iostream>
#include <thread>
#include <atomic>
void func1(std::atomic_bool& quit) {
while (!quit.load()) {
std::this_thread::sleep_for(std::chrono::milliseconds(100));
}
std::cout << "thread1 quit\n";
}
int main() {
std::atomic_bool quit{false};
std::cout << "start func1" << std::endl;
std::thread t1{func1, std::ref(quit)};
std::this_thread::sleep_for(std::chrono::seconds(5));
quit.store(true);
t1.join();
std::cout << "func1 joined" << std::endl;
return 0;
}
|
原子操作提供了一种比互斥锁更轻量级的同步机制,在某些场景下可以显著提高性能.
伪共享
伪共享(False Sharing)是多线程编程中常见的性能问题,指多个线程频繁访问不同变量,但这些变量位于同一缓存行(cache line,通常64字节)中,导致缓存失效和不必要的同步开销。
为什么会发生伪共享?
现代 CPU 使用多级缓存(L1/L2/L3),缓存以缓存行为单位(AMD/Intel x86 通常64字节)。当一个核心修改缓存行时,整个缓存行会被 失效(invalidate)其他核心的对应缓存,其他核心需从总线重新加载。
即使变量不同,只要在同一缓存行,修改一个也会影响另一个,导致伪共享。
示例:无 padding 的伪共享
1
2
3
4
5
6
7
8
9
10
11
12
13
14
15
16
17
18
19
20
21
22
23
24
25
26
27
28
29
30
31
32
33
34
35
36
37
38
39
40
| #include <iostream>
#include <atomic>
#include <thread>
#include <vector>
struct NoPadding {
std::atomic<long long> a{0};
std::atomic<long long> b{0};
};
NoPadding counters;
void worker1() {
for (int i = 0; i < 100000000; ++i) {
counters.a.fetch_add(1, std::memory_order_relaxed);
}
}
void worker2() {
for (int i = 0; i < 100000000; ++i) {
counters.b.fetch_add(1, std::memory_order_relaxed);
}
}
int main() {
auto start = std::chrono::high_resolution_clock::now();
std::thread t1(worker1);
std::thread t2(worker2);
t1.join();
t2.join();
auto end = std::chrono::high_resolution_clock::now();
auto duration = std::chrono::duration_cast<std::chrono::milliseconds>(end - start);
std::cout << "No padding duration: " << duration.count() << " ms\n";
std::cout << "a: " << counters.a.load() << ", b: " << counters.b.load() << std::endl;
return 0;
}
|
问题:尽管 a 和 b 独立,性能差(可能几百 ms)。
解决方案:Cache Padding(缓存填充)
在变量间添加padding,确保每个 atomic 独占一个缓存行:
1
2
3
4
5
6
| struct Padding {
std::atomic<long long> a{0};
char pad1[std::hardware_constructive_interference_size - 8];
std::atomic<long long> b{0};
char pad2[std::hardware_constructive_interference_size - 8];
};
|
完整示例:
1
2
3
4
5
6
7
8
9
10
11
12
13
14
15
16
17
18
19
20
21
22
23
24
25
26
27
28
29
30
31
32
33
34
35
36
37
38
39
40
41
42
| #include <iostream>
#include <atomic>
#include <thread>
#include <vector>
struct Padding {
std::atomic<long long> a{0};
char pad1[56];
std::atomic<long long> b{0};
char pad2[56];
};
Padding padded_counters;
void worker1_padded() {
for (int i = 0; i < 100000000; ++i) {
padded_counters.a.fetch_add(1, std::memory_order_relaxed);
}
}
void worker2_padded() {
for (int i = 0; i < 100000000; ++i) {
padded_counters.b.fetch_add(1, std::memory_order_relaxed);
}
}
int main() {
auto start = std::chrono::high_resolution_clock::now();
std::thread t1(worker1_padded);
std::thread t2(worker2_padded);
t1.join();
t2.join();
auto end = std::chrono::high_resolution_clock::now();
auto duration = std::chrono::duration_cast<std::chrono::milliseconds>;(end - start);
std::cout << "Padding duration: " << duration.count() << " ms\n";
std::cout << "a: " << padded_counters.a.load() << ", b: " << padded_counters.b.load() << std::endl;
return 0;
}
|
效果:性能提升 5-10 倍(可能几十 ms)。
最佳实践
使用 alignas(std::hardware_constructive_interference_size):C++17 标准方式,动态获取硬件推荐的构造性干扰大小(缓存行大小,通常64字节),避免硬编码。
需要 #include <new>
1
2
3
4
| struct AlignedPadding {
alignas(std::hardware_constructive_interference_size) std::atomic<long long> a{0};
alignas(std::hardware_constructive_interference_size) std::atomic<long long> b{0};
};
|
工具检测:用 perf、VTune 等分析缓存 miss。
数组场景:线程计数器数组,每线程独占缓存行。
1
2
| std::atomic<long long> counters[CPU_CORES];
|
注意:
- Padding 增加内存占用。
- 只对高频写场景有效。
- 多核 CPU 更明显。
伪共享是隐形杀手,优化后性能提升显著!
CPU 缓存回顾 & MESI 协议
缓存层次:
- L1d: 32KB/core, 私有, 3-5 cycles
- L2 : 1MB/core, 私有, 12 cycles
- L3 : 共享, 40+ cycles
MESI 状态机:
- Thread A 修改 → M (Modified)
- 广播 I (Invalid) 到 B/C/D 核心
- B 访问 → Snoop Bus 重载 → 延迟 100-500 cycles
性能基准数据
i7-12700K (12 核), 1e8 fetch_add:
| 配置 | 时间 (ms) | Cache Misses |
|---|
| 单线程 | 25 | 0 |
| 伪共享 | 620 | 1.2e9 |
| Padding | 52 | 1.2e7 (99% 减) |
高级场景:Per-Thread Counters
1
2
3
4
5
6
7
8
| constexpr int NUM_THREADS = 8;
alignas(64) std::atomic<long long> thread_counters[NUM_THREADS]{};
void thread_fn(int tid) {
for (int i = 0; i < 1e8; ++i) {
thread_counters[tid].fetch_add(1, std::memory_order_relaxed);
}
}
|
跨 NUMA (双 socket):padding 128B。
库 & 框架防范
- Abseil:
absl::Atomic<long long, absl::kCacheAligned> - Folly:
folly::cacheline_pad - TBB:内部 padding。
检测 & 调优工具
perf:
1
| perf stat -e L1-dcache-load-misses,L1-dcache-store-misses ./bench
|
Valgrind Cachegrind:
1
| valgrind --tool=cachegrind ./bench
|
Intel VTune / AMD uProf:Memory Access 分析。
takeaway:高频 atomic 写,必查伪共享!Padding 是银弹。